20 simple and incredible trips to get fascinating nails
Every girl has struggled by painting her nails on more than one occasion. Here we show you 20 tricks to achieve attractive nails.
The tricks are given below:
- Before painting your nails go over them Vaseline or white glue: Spread a cotton swab with Vaseline around the nails. This creates a layer of the enamel and your skin so that after painting your nails you can remove the Vaseline and with it any enamel error. Another way to prevent the paint from drying out your nails is to use white glue. After painting, just remove it.
- To prevent the painted nails from splintering, paint two layers of base: The first layer of enamel should be applied on the upper middle part of the nail. Wait for it to dry and paint the second layer of enamel, but this time it covers the entire nail. This technique will help the enamel at the tips of the nails to last longer and make them more resistant.
- Use white nail polish as a base coat for a better result in the color of your nails: Unless the enamel is very opaque, the natural tone of your nails will change the color of your enamel. To obtain the true color of the varnish, apply a layer of white enamel, and over it, the colored enamel.
- Paint your designs in a plastic bag, cut them and place them on your nails: Making designs on your nails can be very complicated: try painting your design on a plastic bag first. Paint several layers of enamel on the plastic, and then add your design on top. After drying remove the “shell” of the design and put it on the nail.
- Use the folder sheet protectors as a guide to creating designs: Use sticky paper circles along the base of the nail. Paint your first layer on each nail and change the position of the labels. Let each application dry for one minute. Carefully remove the paper circles.
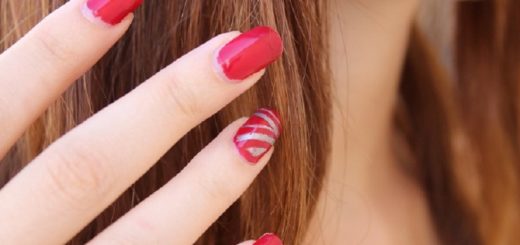
- Give your nails a two-tone design with ribbon: Choose two different colors of enamel and paint a lighter enamel layer on each nail. After it is completely dry, place strips of adhesive tape to form designs based on lines applying the darker color. Wait a minute for it to be completely dry, then grab both ends of the tape and remove them at the same time to see the result.
- With the tip of a pencil place accessories such as small diamonds on the nails: When you want to place small pieces to decorate your nails use the tip of a pencil to outline eyes or lips instead of putting it with your fingers or with tweezers. The tip of the pencil is sticky to hold the diamond from above and not ruin your design.
- Put a wide garter around the tip to get the French manicure: Grab a garter and tie a knot in the middle, put one end over the thumb to create tension in the garter and align the other end over the top of the nail and just below the edge forms the French tip. Use the edge of the league as a guide and paint the tip of the nail.
- Mix loose pigments with transparent enamel and create a custom nail shade: In a spoon put some eye shadows and then add a transparent glaze on it. Mix everything together with a cotton swab, grab a brush and try the new color.
- In a glass with water pour nail polish drops and create a marble effect: Put tape down and around the nail to protect your skin. Then, in a glass of water at room temperature, pour drops of two different colors of enamel. Once you have added the enamel drops, with a clip, shake the layers together to create the design you want. Put your finger in the glass with water towards the paint layer. Leave your finger inside the glass for a few seconds; use the clip to collect the rest of the paint on your finger. Take your nail out of the water and clean the edges.
- Immerse your nails in ice water after painting them to dry faster: Fill a container with water and ice and after painting your nails, immerse them for a few minutes. In addition to helping your nails to dry faster, cold water will fix the paint better.

Image Source: Google Image
- Spray your nails after painting them with spray cooking oil: Spray cooking oil is very effective for quick drying. When you finish painting your nails a few centimeters away, sprinkle oil on your nails. Wait a few minutes and then wash the oily residue from your hands.
- If the paint was ruined in a nail, adjust the shine of the enamel with the tip of the tongue: If by accident the paint on your nail is ruined, try to regulate the paint with the tip of the tongue and not with your finger. Your tongue is soft enough to fix the paint without leaving a trace. Use this advice only when necessary and try not to lick enamel too often.
- Remove the enamel by soaking a cotton ball with polish remover and wrapping it around your nails: To easily remove the nail polish, on a piece of cotton, pour a little acetone (nail polish remover) and put it on your nails. Then wrap each finger with aluminum foil and press it a little to secure it. Leave on for five minutes and then remove the aluminum along with the cotton. The enamel will be removed quickly.
- To facilitate the extraction of enamel, paint a base of white glue: One way to easily remove the polish from your nails is to apply as a base a layer of white glue. Let the glue dry completely and then on it paint some layers of enamel as you wish. When you decide to remove the enamel, the glue comes off and the enamel will be removed quickly.
- Shake your polish to avoid air bubbles: Take the enamel between your hands and rub them back and forth to move and avoid the creation of air bubbles.
- Loosen the lid of your enamel by immersing it in hot water: Place enamel with the lid down in a glass of water. Fill a glass with hot water, enough to cover the lid but not enough to cover the entire enamel bottle (hot water can alter the consistency of the paint). Wait a few minutes, remove the bottle of nail polish and then open the lid.
- Unscrew the lid of your varnish surrounding it with a rubber band: Wrap the top of your enamel bottle with a rubber band before trying to open it. The league will allow you to have better control when turning the lid.
- To prevent your polish from drying, rub Vaseline around the bottle before closing it: With a cotton swab filled with petroleum jelly, wrap around the edges of the top of your varnish. This will make it easier to open next time and prevent it from sealing when closed.
- Store your enamels standing in a box with colored papers glued on top to indicate their color: To have your glazes organized, paint a spot of enamel on an adhesive paper, drill a hole and color the paint sample on top of the enamel bottle. Repeat this step with each of the varnish bottles, put them in a box and store them in a cool and dry place.


